Plugins are like a set of building blocks that you can freely combine to create the functionality you want. Adding plugins is an excellent way to extend Apache Answer's features. This article will provide a detailed guide on the installation steps, helping you easily add plugins and master the process of installing and using them.
Download Plugins
- Click here to download the desired plugin from the official Apache Answer plugin repository.
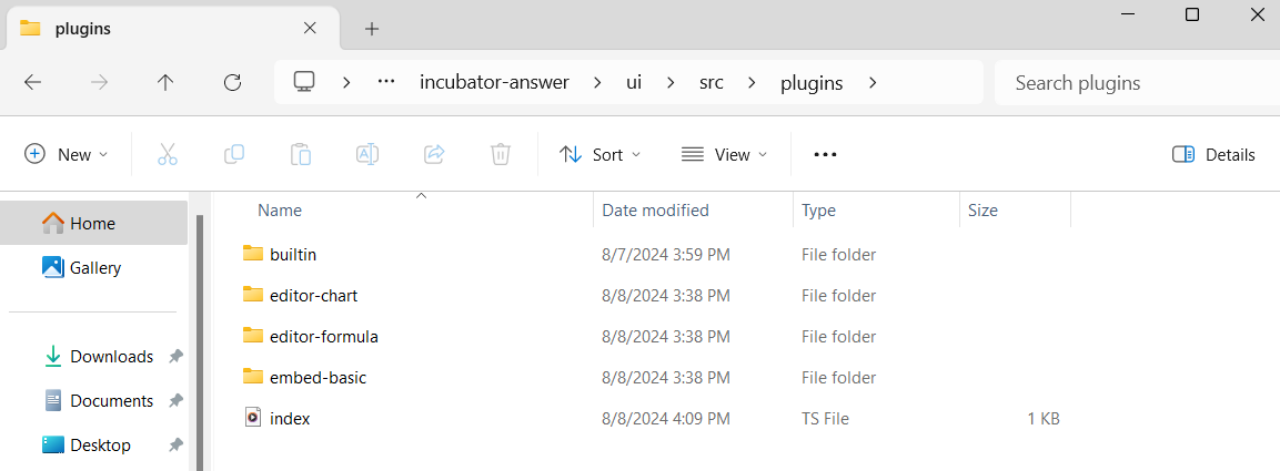
- Place the Plugin: Move the downloaded plugin files into the
./ui/src/pluginsdirectory of your project. - Plugin Type Reference: https://answer.apache.org/docs/development/plugins
Important: The folder should be named "plugins," not "plugin."
Install Standard UI Plugin
- In the terminal, run
cd ./uito navigate to the ui directory. - Install dependencies: Run
pnpm pre-install. - Start the project: Run
pnpm startto launch the development server. - Backend Plugin Setup: In a new terminal window, continue with the backend plugin installation steps.
Install Backend Plugin
- Compile Frontend Code:
- Linux/MacOS: Run
make ui. - Windows: Run
pnpm installandpnpm build.
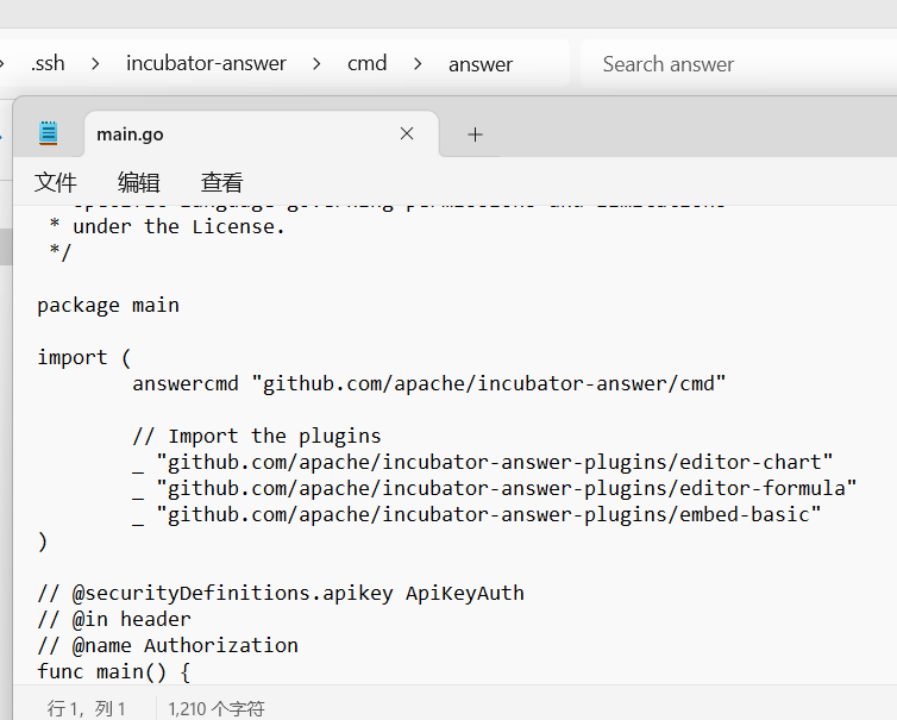
- Import Plugin: In the
cmd/answer/main.gofile, import the plugin (replace my-plugin with your plugin name):
import (
    answercmd "github.com/apache/answer/cmd"
    // Import the plugins
    _ "github.com/apache/answer-plugins/my-plugin"
)
The image below shows examples with the editor-chart, editor-formula, and embed-basic plugins.
- Update go.mod: Navigate back to the project root directory by running
cd ... Usego mod editto add the plugin to the go.mod file:
go mod edit -replace=github.com/apache/answer-plugins/my-plugin=./ui/src/plugins/my-plugin
Note: Windows users need to use double quotes, as shown below:
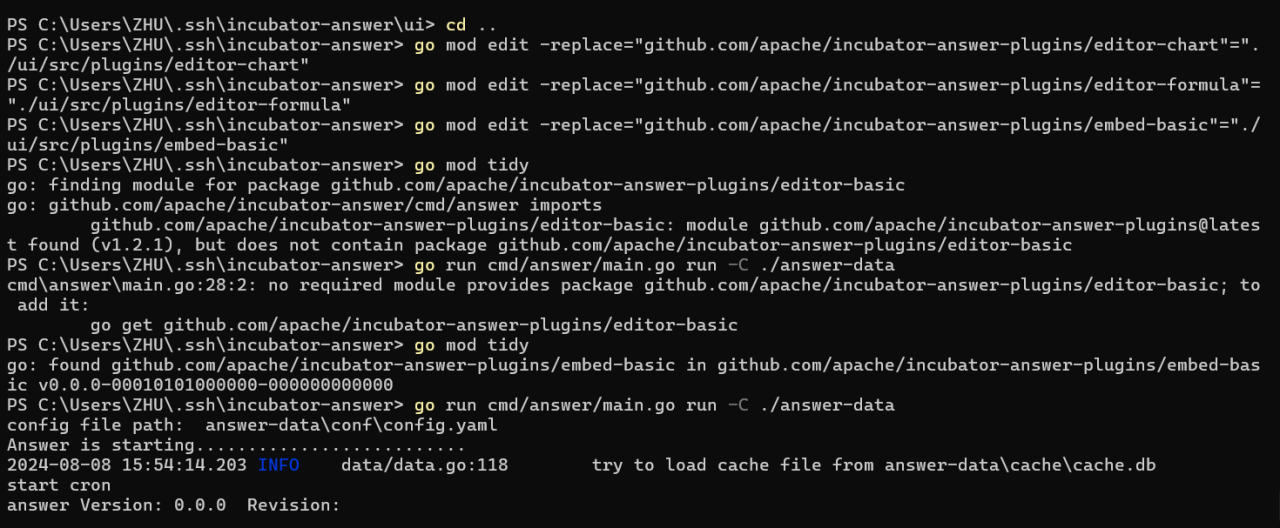
go mod edit -replace="github.com/apache/answer-plugins/my-plugin"="./ui/src/plugins/my-plugin"
Example with the editor-chart, editor-formula, and embed-basic plugins.
- Download Dependencies: Run
go mod tidyto download and update dependencies. - Start the Project: Run
go run cmd/answer/main.go run -C ./answer-data.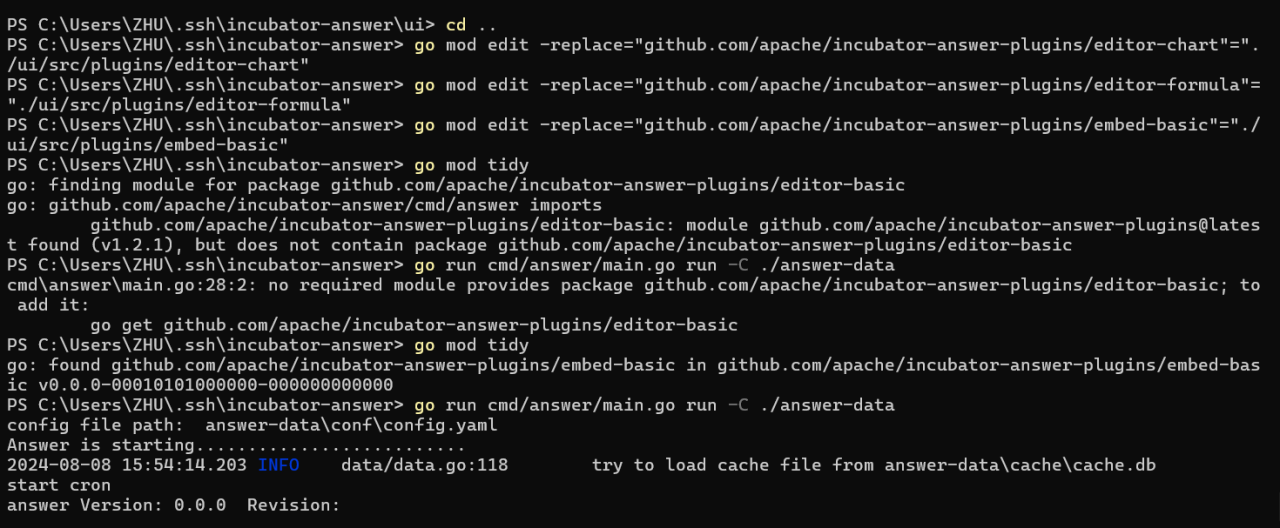
Open the backend interface URL in your browser. Under the Admin - Installed Plugins section, you'll see the added plugins. Click the ⋮ in the Action column to activate or remove the plugin.
Congratulations, you've successfully added a plugin! Click here to explore more community-built plugins. Additionally, we offer a detailed tutorial on How to Package and Deploy Answer Plugins and a Plugin Development Guide to make your Apache Answer even more powerful.